
You can create a nested menu in your store header on Store.link, making it easier for customers to browse your products. This feature lets you group links under a main menu item; perfect for organizing products into categories or subcategories.
The above image shows you an example of a nested menu. It consists of a main menu - "All items" and two sub menus under it - "Cats" & "Dogs". Let's see how to add such a nested menu.
Go to Design
Open your Store.link dashboard and click on Design. Under Homepage > Sections, you'll find Header.

Add a new menu
Under Links, click on +Add. Here, you have the option to add a Menu section. This will serve as the parent menu, which can consist of submenus with links. Let's add a menu.
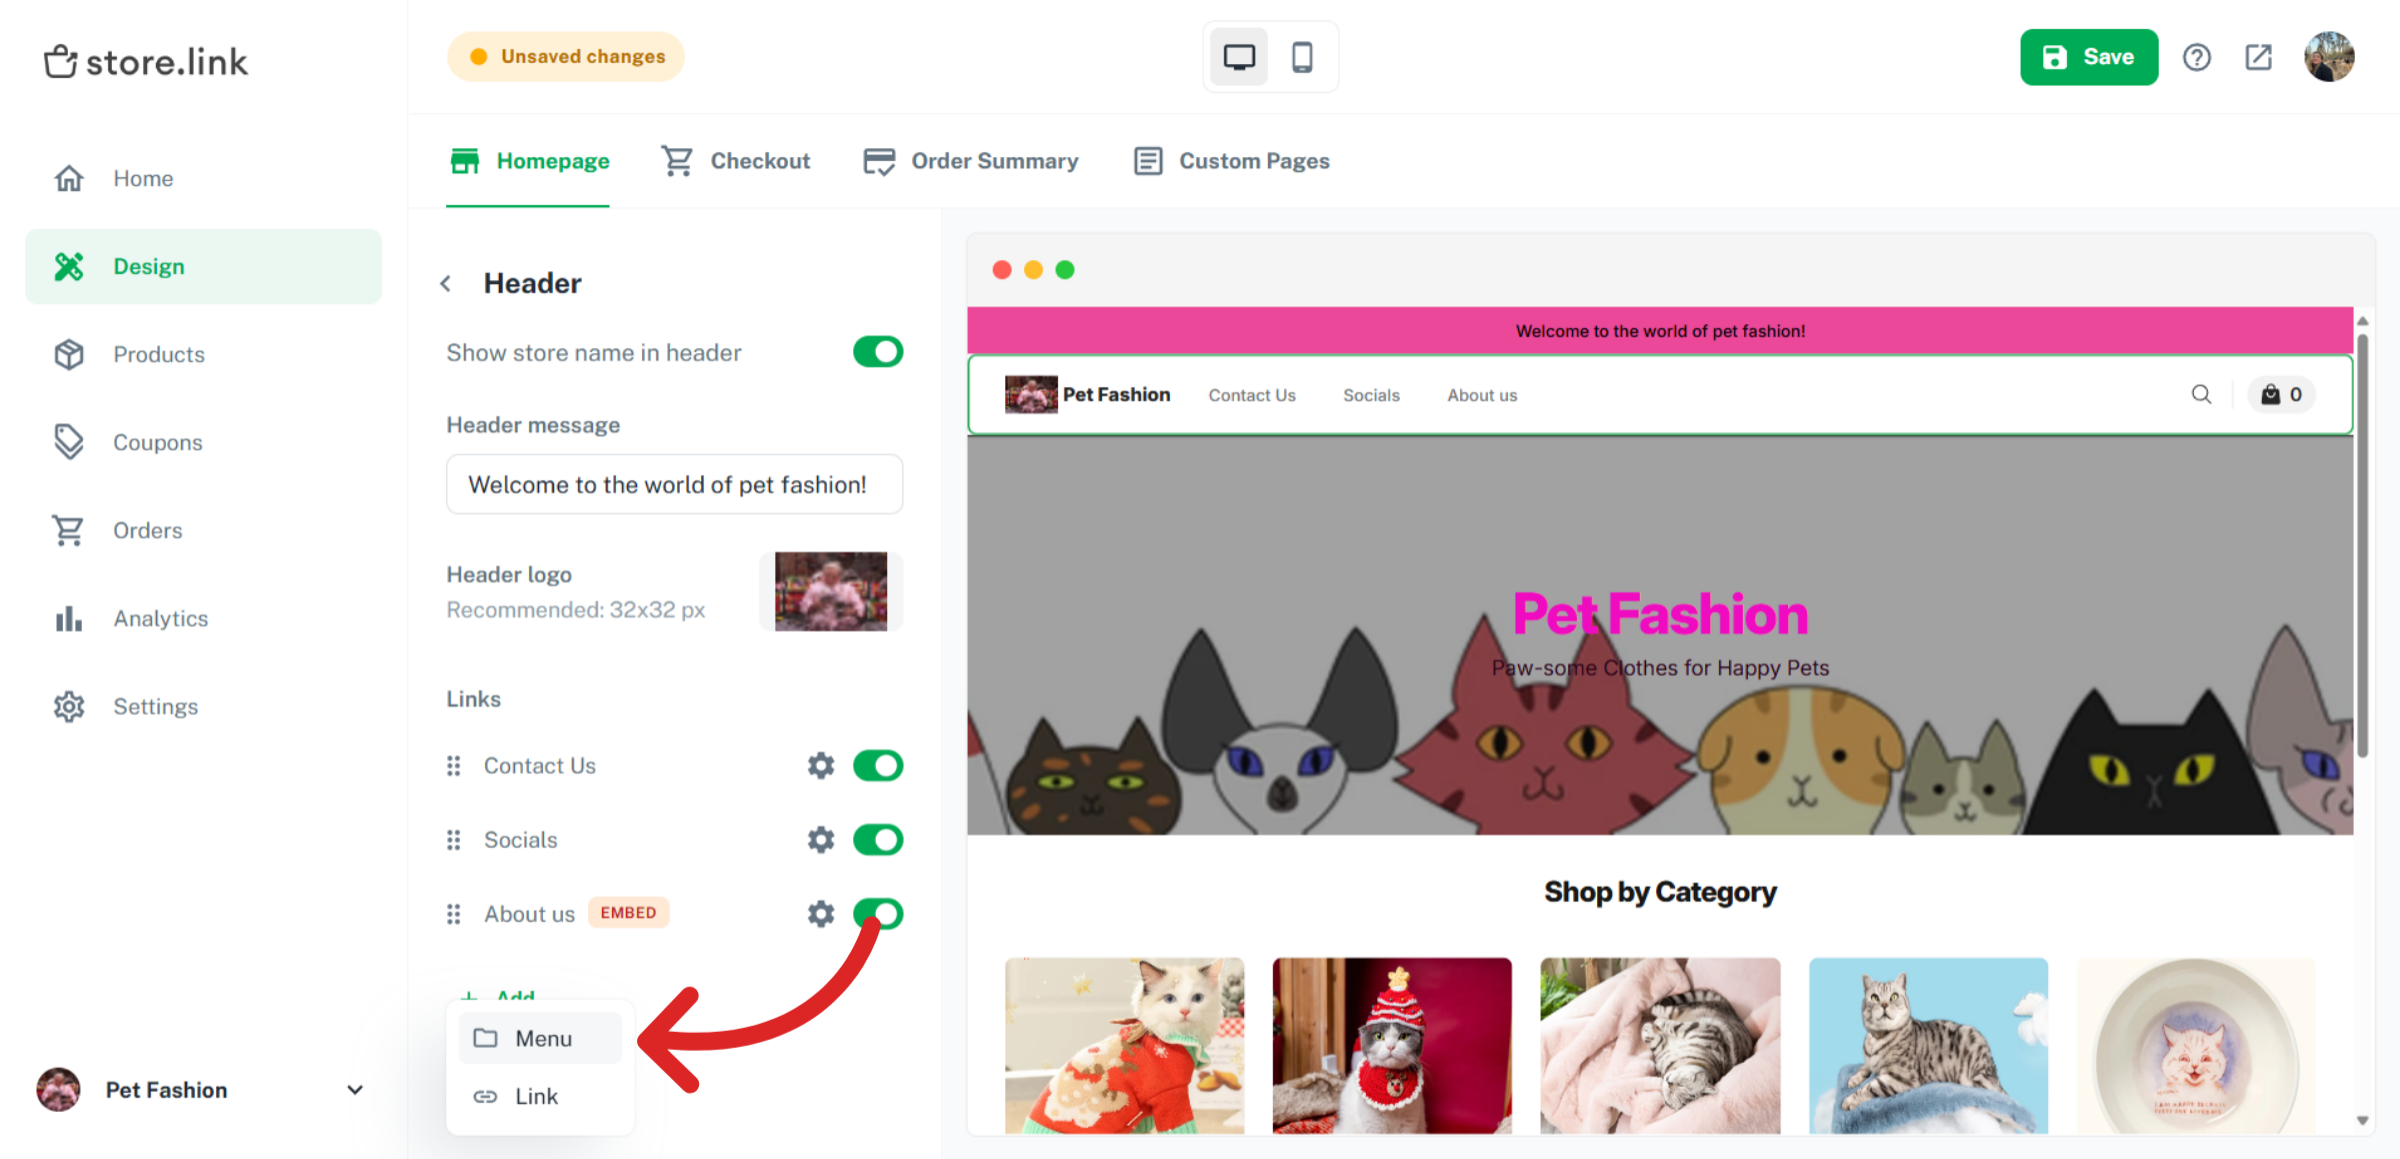
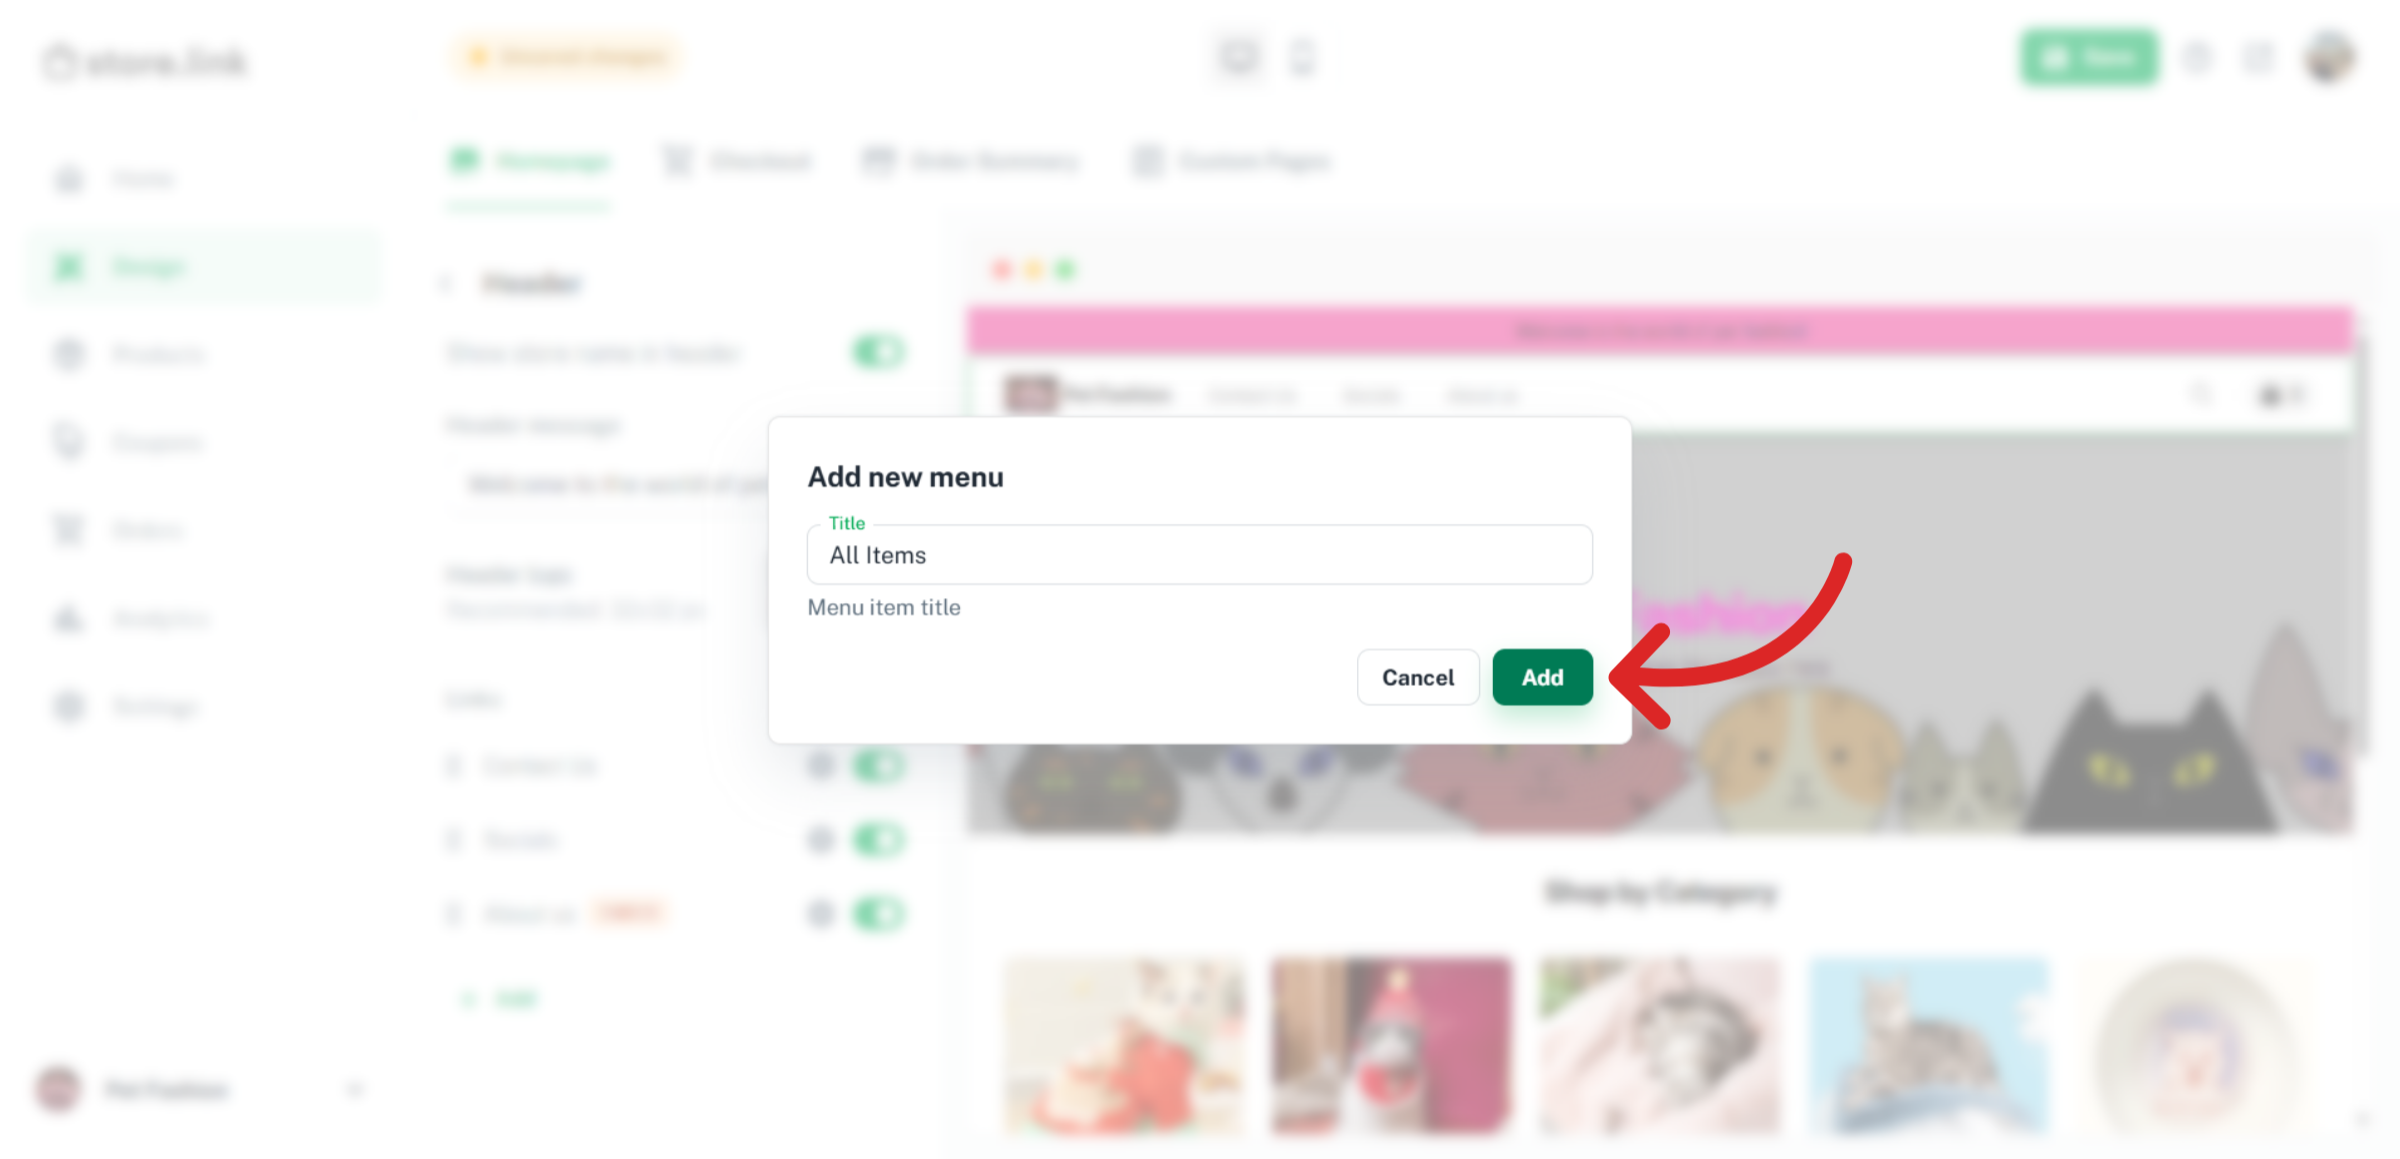
Enter a title for your new menu. In this example, we will use All Items as it will be our main category.
Add a new section
Once you've added your menu, you'll see a + sign next to it. Click on this to add your submenu.
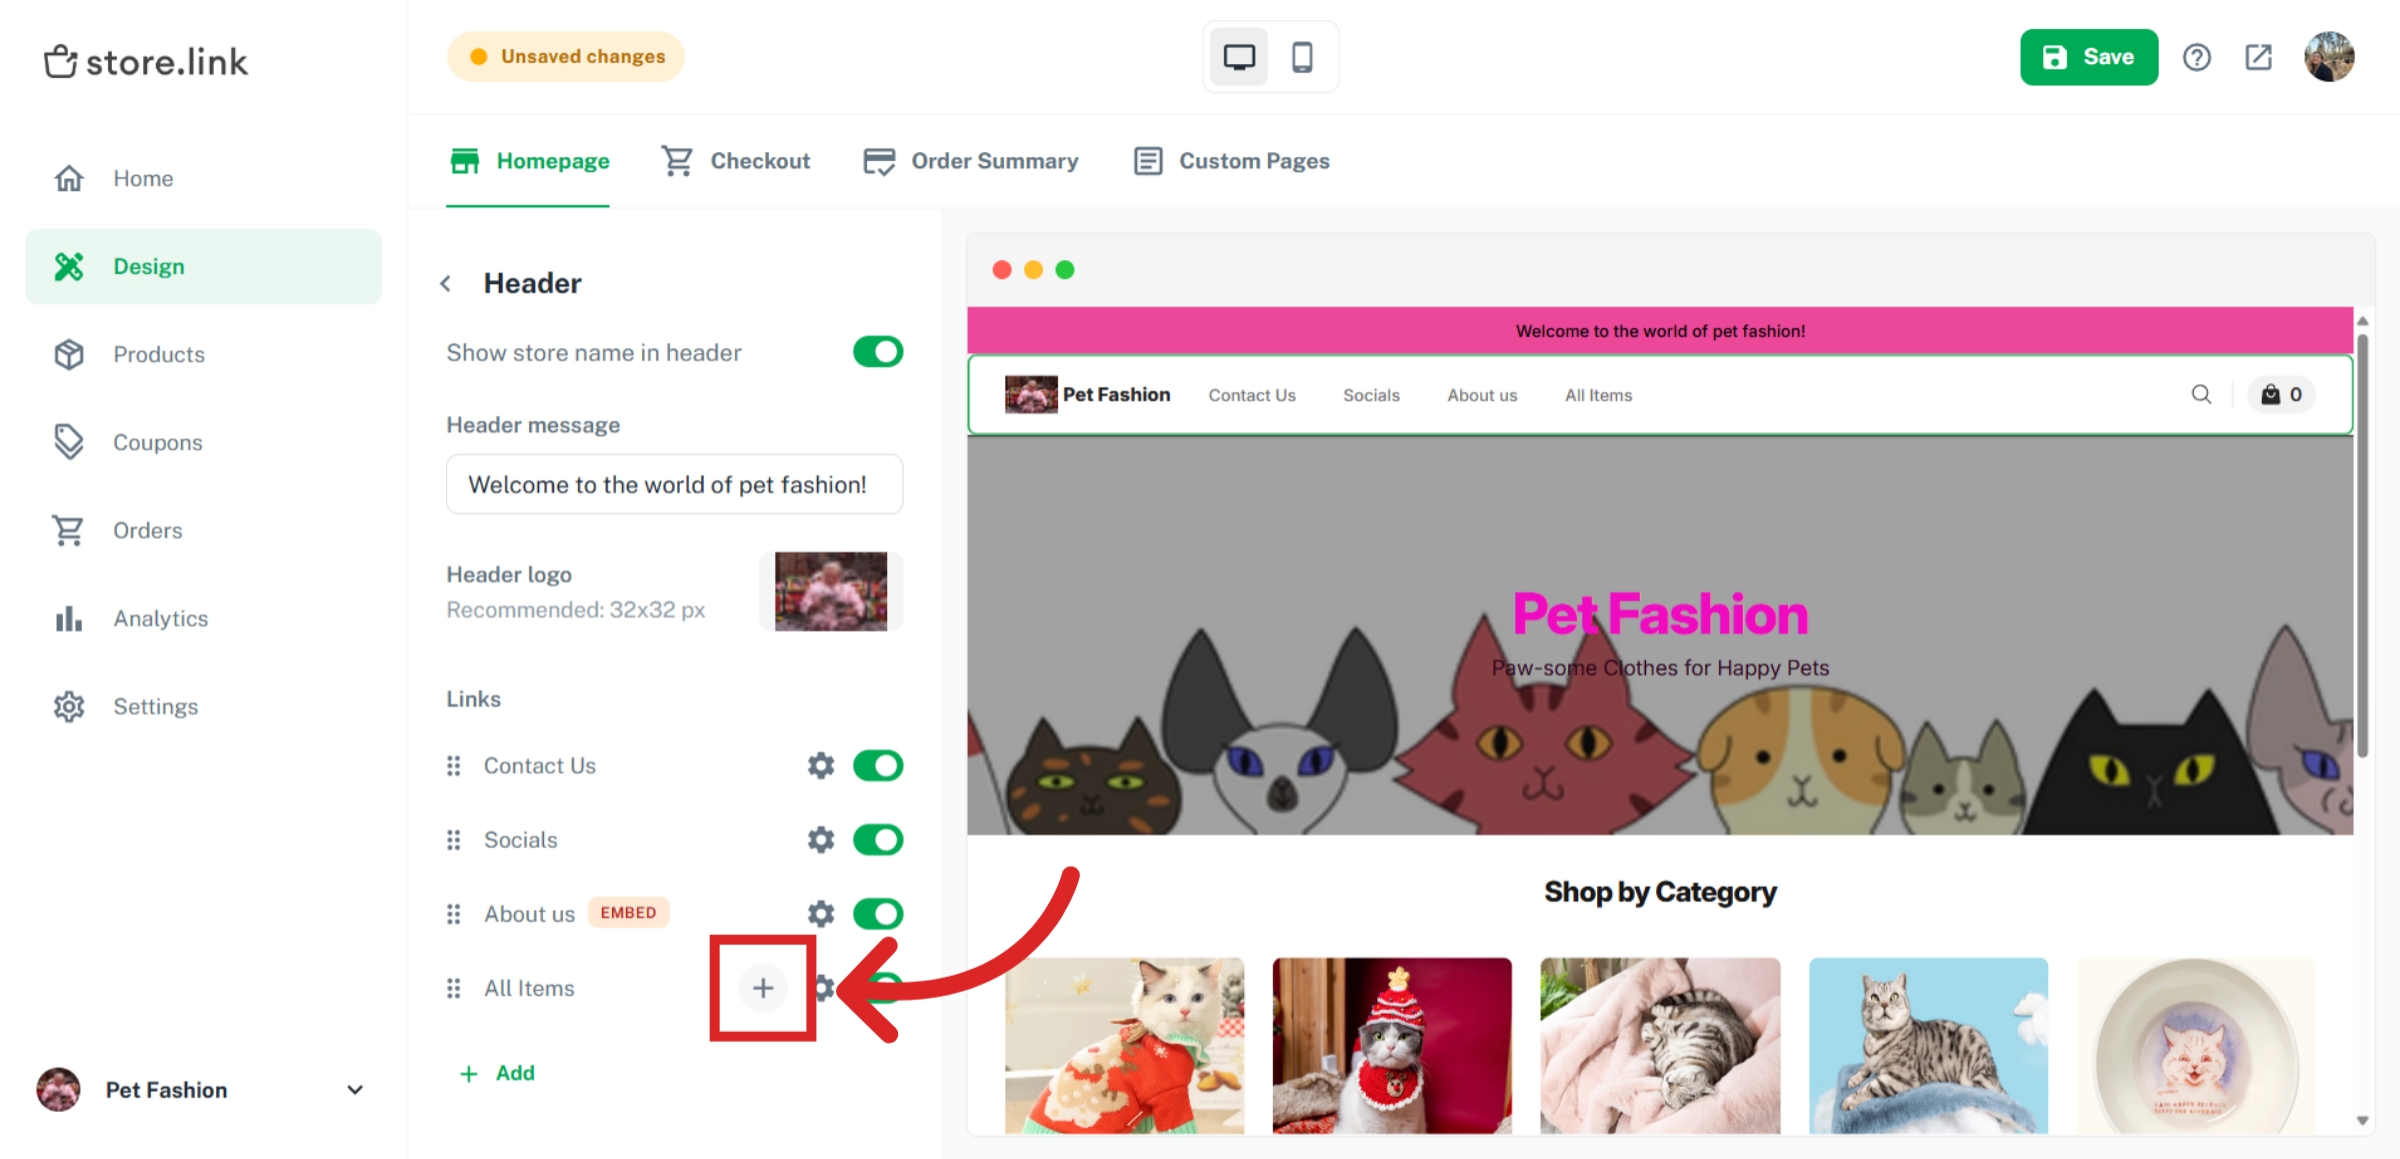
Choose Menu.
Give a name to your submenu and click on Add.
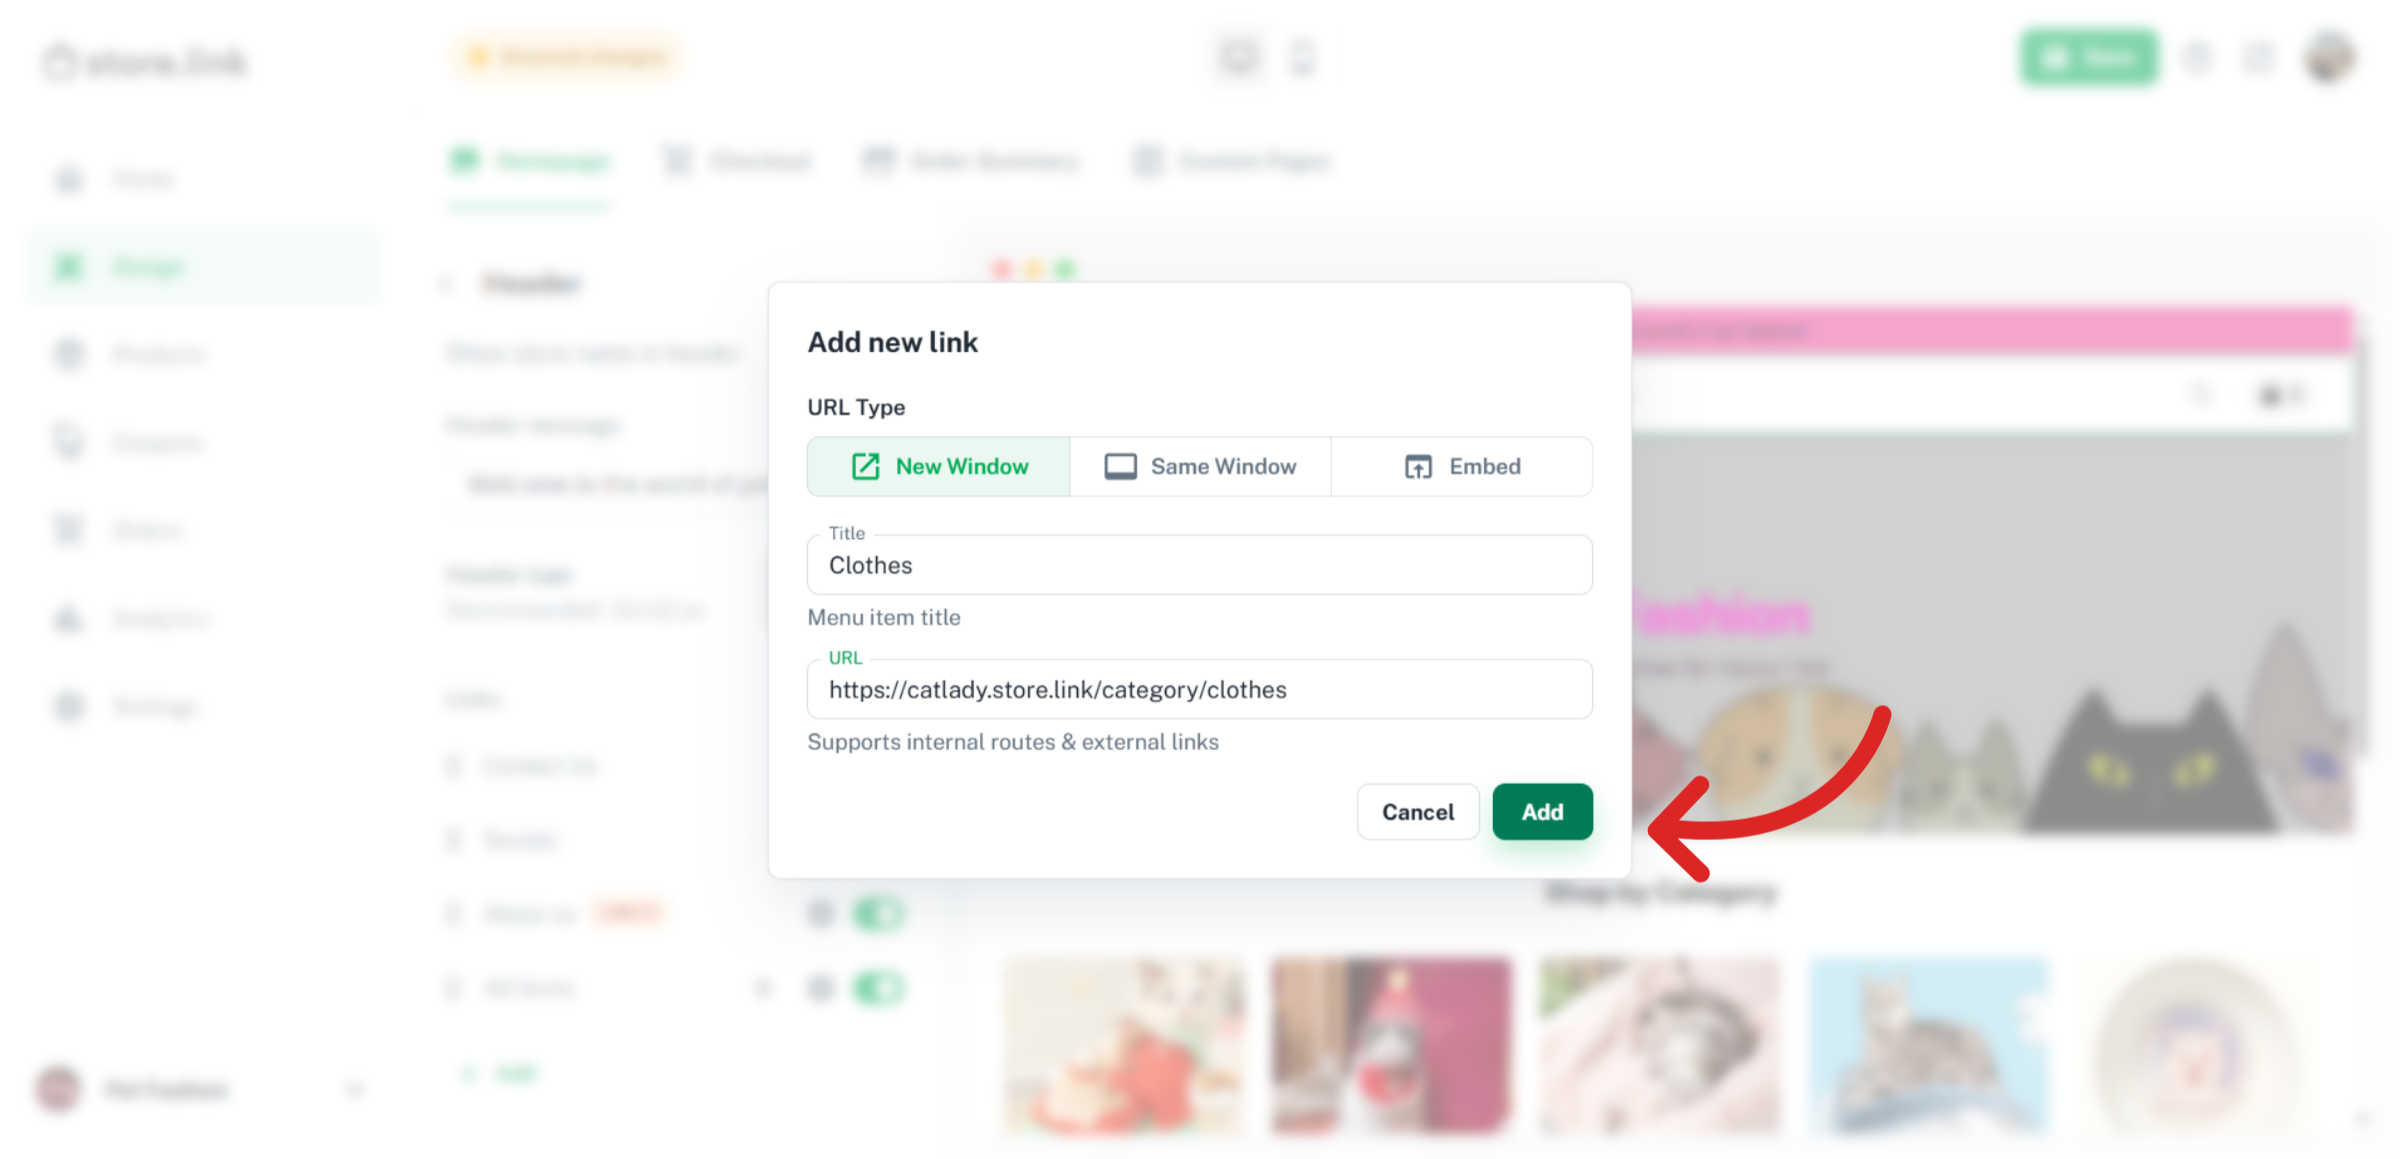
Add a new link
Now that the submenu has been added, it's time to add the links that will go under it. Click on the + symbol next to the sub menu, "Cats" and choose link.
You can add any link here. It can be product links or category links. Here, we will add the different category links under the sub menu for "Cats".
Repeat the process to add more links under "Cats". Add your second submenu "Dogs" and add links under that too.
Review the new menus
Go to your online store's website to see how your new menus and submenus look.
Still need help?
Contact us